1 Setup
This chapter will take you through all steps necessary to fully setup your computer. There are several things we need to do:
- First, in section 1.1 we will install both R and Rstudio.
- Next, in section 1.2 we will install some necessary R packages and configure some recommended Rstudio settings.
- Finally, in section 1.3 we will setup an organization system for your files.
1.1 R/Rstudio setup
We will be using both R and Rstudio throughout the course.
- R is a free and open-source statistical computing software.
-
Rstudio is an IDE (integrated development environment) that makes developing in R much easier.
- If you prefer, you can also use a different IDE like Visual Studio or Jupyter.
R and Rstudio are two different programs that both need to be installed! Also, if you have previously installed R or Rstudio, it is highly recommended to first completely uninstall it before reinstalling the latest version to avoid conflicts (instructions for Windows and Mac).
First, we will install the latest R release, version 4.5.2 released on Oct 31, 2025; then we will install Rstudio. The instructions below are separated by operating system, depending on if you have a Windows or Mac machine.
- If you have a Linux system, follow one of the linked instructions here.
- If you have a Chromebook, try these steps.
1.1.1 Windows instructions
Download R-4.5.2-win.exe and run it, accepting all default settings.
Download Rstudio-latest.exe and run it, again accepting all default settings.
-
Sometimes, R may need to recompile a package during installation, which will require the Rtools utility. To download the right version, check your system’s about page and look at the “System type” line.
- If it shows “… x64-based processor”, download this Rtools installer and run it, accepting all default settings.
- If it shows “… ARM-based processor”, download this Rtools installer and run it, accepting all default settings.
Now, you should have both R and Rstudio setup. To check the installation, find “Rstudio” in your start menu and run it. If asked to choose an installation, just accept the default and click OK.
If you get a window that looks like this, you’re all set and are ready to move on to the next section!
1.1.2 Mac instructions
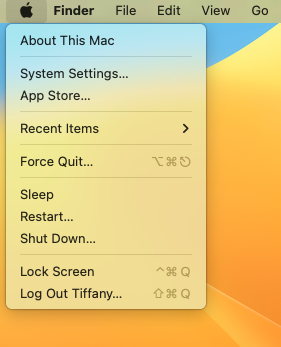
- First, we need to determine the right R installer file for your specific machine. Open the Apple menu in the top left corner of your screen and open “About this mac”.
- If it shows “Chip: Apple M1/M2/M3”, download R-4.5.2-arm64.pkg and run it, accepting all default settings.
- If it shows “Processor: …Intel Core”, download R-4.5.2-x86_64.pkg and run it, accepting all default settings.
- If you get an error, check your OS version in the About window. If it’s older (i.e. <11) you may need to either upgrade your OS or download an older version here.
- Now, download Rstudio-latest.dmg and install it. Note this is a dmg or virtual disk image file, so you need to follow these steps to install it:
- Double click the file to open it. This will mount a virtual drive to your desktop and then open it in a new Finder window.
- In the new window, drag the Rstudio icon into the Applications directory. This will install it to your computer.
- Open a new Finder window, go to the Applications directory, find the new Rstudio program and drag it into your dock for easy access.
- (Optional) You can now unmount the virtual disk. Right click the mounted virtual disk on your desktop and choose “Unmount”, or alternatively find the mounted drive on the right side of your dock and drag it to the trash bin. You can also delete the .dmg install file.
- On many (but not all) systems, two additional programs need to be installed for everything to run smoothly. It is recommended for everyone to install these just in case (there’s no harm if you didn’t actually need them).
- Download XQuartz-2.8.5.pkg and run it, accepting all default settings. This installs a tool that Rstudio uses to display certain outputs.
- Using either Spotlight, Launchpad, or the Applications directory, open “Terminal” and type in or copy this line
xcode-select --installand hit enter, then follow on-screen instructions. You may be asked for your fingerprint or password (note your password will not show as you type, this is normal and done for security purposes).
On some machines, R or Rstudio may be blocked by your OS out of an overabundance of caution. Follow these steps to unblock and then try again.
Now, assuming everything went smoothly, you should have both R and Rstudio setup. To check the installation, find “Rstudio” in your Dock or Applications directory and run it. If asked to choose an installation, just accept the default and click OK.
If you get a window that looks like this, you’re all set!
1.2 Packages/config
Before continuing, make sure that you can open Rstudio and have the correct version (R-4.5.2) installed!
Next, we will install some necessary packages and configure some recommended options to improve workflow.
-
Open Rstudio. In the Console window, type in or copy this line
install.packages(c("tidyverse","rmarkdown"))and hit enter.- If Rstudio asks you whether to “use a personal library”, choose yes.
- If Rstudio asks you whether to “install from source”, first try choosing no which should work for most people. If that fails, try repeating step 1, but this time choose yes.
Make sure you see either “successfully unpacked” or “downloaded binary packages are in” in the console messages to confirm installation succeeded.
-
Next, from the menu bar at the top, go to “Tools” > “Global Options”.
- On this first page, under the “Workspace” section, set the following:
- Turn off “Restore .RData into workspace at startup”
- This ensures every time we close and reopen Rstudio that we start with a fresh session uncluttered with junk from previous sessions.
- Change “Save workspace to .Rdata on exit:” to “Never”
- This stops Rstudio from asking you during shutdown if you want to save your session, also preventing clutter.
- Turn off “Restore .RData into workspace at startup”
- Next, on the “R Markdown” page of the Options window, set the following:
- Change “Show output preview in:” to “Viewer Pane”
- This improves workflow by displaying plots in the Viewer pane instead of opening a new window.
- Turn off “Show output inline for all R Markdown documents”
- This also improves workflow by displaying output in the console instead of inline in documents.
- Change “Show output preview in:” to “Viewer Pane”
- (Optional) If you wish to customize the interface, you can go to the “Appearance” page and change your font or theme.2
- Press OK to save your changes.
There are LOTS of other options you can feel free to explore later on your own, but for now we will move on.
- On this first page, under the “Workspace” section, set the following:
-
Due to poor design, we need to repeat the previous R Markdown configuration steps again because Rstudio duplicates these settings in another menu.
- From the menu bar at the top, go to “File” > “New File” > “R Markdown”. Ignore the options in the new window and click “OK” to create a new R Markdown file (we will learn more about R Markdown files later).
- In the new editor pane, open the gear-icon dropdown menu and make sure to reselect the same options (highlighted in red).
Now your R/Rstudio should be properly setup.
1.3 File organization
There will be a lot of files to keep track of in this course, so it is highly recommended you create a neat directory structure on your computer to help organize your files. We recommend a directory structure similar to this:
..
└── STAT240/
    ├── data/
    ├── discussion/
    │   ├── ds01/
    │   ├── ds02/
    │   ├── ds03/
    │   :    :
    ├── homework/
    │   ├── hw01/
    │   ├── hw02/
    │   ├── hw03/
    │   :    :
    ├── notes/
    └── project/
“Directory” is synonymous with “folder”. In technical spaces, “directory” is often the preferred term.
This tree diagram shows somewhere in your computer (“..”) you should make a “STAT240” directory. Inside, you should have directories like “homework” and “discussion” with a subdirectory for each specific assignment (e.g. “hw01”, “hw02”, “ds01”, “ds02”, etc..).
We also recommend creating directories “data”, where you should place all the datasets you download; “notes”, where you can place any other notes you download or take; and “project”, where you can place your project files when those are assigned later. If necessary, you can also create further directories at your own discretion.
Make sure your STAT240 directory is NOT backed up by a cloud synchronized app like OneDrive, Box, or iCloud. These programs sometimes interfere with R/Rstudio and may also cut off larger datasets.
We recommend you pick a different parent directory (“..”) than “Desktop” or “Documents” since these are often backed up by default on many modern systems. A good alternative is either the “Downloads” directory which is usually not backed up, or your user’s home directory (instructions for Windows and Mac).
After creation, you can make this directory more convenient to access by making a shortcut on your desktop, or pinning it to somewhere accessible like Quick Access for Windows or your Dock for Macs.